by Sangeetha | Feb 19, 2024 | hp proliant server, Server
HPE ProLiant DL385 Gen10 server
We are living in the era of Big Data, with data volumes and types constantly expanding across industries. This new data landscape brings with it immense opportunities but also challenges for organizations to effectively collect, store, manage and analyze massive datasets. As the core of any data infrastructure, servers play a crucial role in enabling insights and innovation from data assets.
HP’s latest generation HPE ProLiant DL385 Gen10 server shows impressive advancements that make it highly optimized for the demands of the data-driven digital age. As one of HP’s most powerful single-socket platforms, the 12th generation DL385 pushes the boundaries in dense, high-performance computing through its innovative architecture and design.
At the heart of the DL385 Gen12 is Intel’s 3rd generation Xeon Scalable processors, code-named Ice Lake. Featuring up to 40 cores per socket, the new Platinum and Gold processors bring an unprecedented level of processing power in a compact 1U form factor. They also integrate new enhancements like Intel’s built-in artificial intelligence accelerators.
In addition to raw CPU muscle, the DL385 has been engineered from the ground up with memory-intensive and storage-heavy workflows in mind. It supports an industry-leading 24 DIMM slots, allowing up to 6TB of DDR4 memory – enough capacity to store and analyze massive datasets in memory without slowing down.
Equally impressive are its storage capabilities, with support for up to 48 SAS/SATA drives or 32 NVMe SSDs. The latest generation NVMe drives deliver flash performance of over 7GB/s per drive. Combined with new software-defined storage technologies, organizations can set up highly scalable, flexible storage tiers that optimize for different data access patterns and budgets.
Other highlights of the DL385 Gen12 include expanded I/O with embedded 10GbE and 25GbE as well as hardware-based security features. Its modular architecture and tool-less serviceability further enhance total cost of ownership with ease of upgrades and maintenance.
Overall, the new HP DL385 continues its lineage as a leading platform for data-intensive applications ranging from AI, analytics and databases to VDI and virtualization. Its optimized hardware configuration sets a new bar for single-socket density balanced with scalable performance. As data center footprints shrink while demands grow exponentially, the DL385 delivers a future-proof solution to power our data-driven digital age.
That concludes my overview of how HP’s latest DL385 Gen12 server has been purpose-built from the chip level up to excel at data-centric workloads. Let me know if you need any additional technical perspective or analysis. I’d be happy to discuss specific use cases and workload validation too.
by Sangeetha | Oct 26, 2023 | Uncategorized
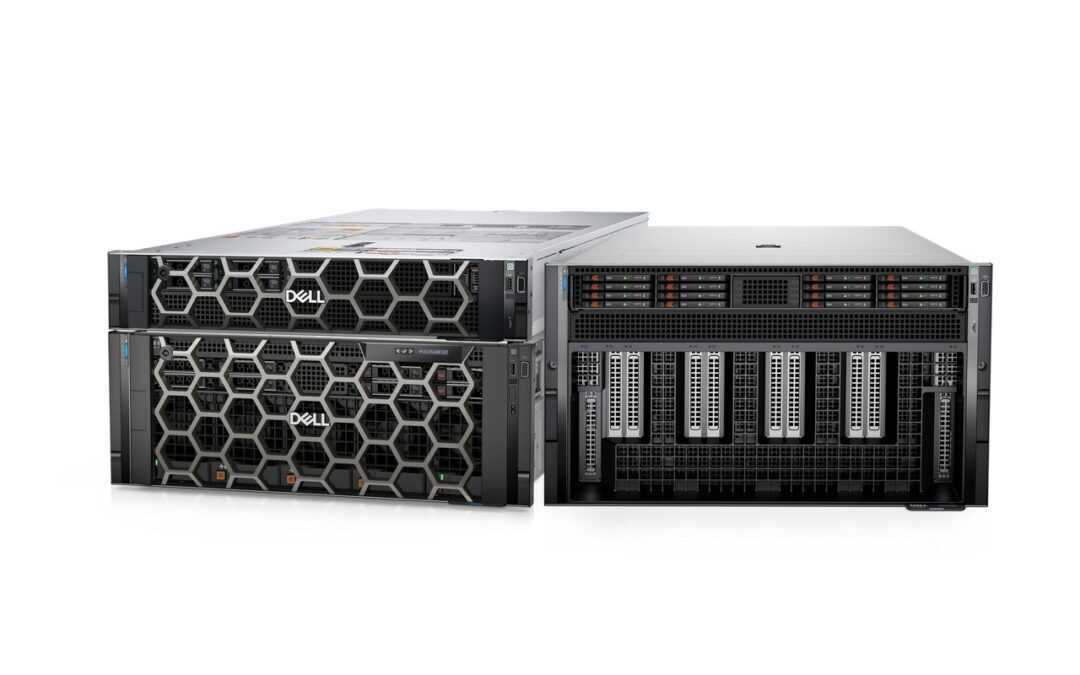
The Dell PowerEdge XE9640
In the realm of data centers and enterprise solutions, reliability, performance, and scalability are non-negotiable factors. Dell, a leader in the world of business technology, has consistently delivered top-notch server solutions to meet the needs of modern businesses. In this article, we dive deep into the Dell PowerEdge XE9640, a server that redefines the capabilities and standards for data center operations.
A Robust Beast: Hardware and Performance
The Dell PowerEdge XE9640 is a true workhorse, designed to cater to the most demanding server workloads. Equipped with the latest Intel Xeon processors, it can handle compute-intensive tasks with ease. Whether you’re running virtualization, databases, high-performance computing, or AI workloads, this server is more than up to the challenge.
Tech Specs:
- Processor Options: Dual Intel Xeon Scalable processors
- Memory: Support for up to 96 DIMMs with a maximum capacity of 12TB
- Storage: High capacity and performance options, supporting up to 24 hot-swappable 2.5″ drives
- Expansion: Multiple PCIe slots for expansion
Scalability: Ready for the Future
One of the standout features of the PowerEdge XE9640 is its scalability. As your business grows, this server can grow with it. With support for up to 96 DIMMs, it can handle a vast amount of memory, making it ideal for virtualization and memory-intensive applications. The numerous PCIe slots provide room for expansion, allowing you to adapt to changing needs without replacing the entire server.
Reliability and Redundancy: Built to Stay Online
Dell knows the importance of uptime for any enterprise. The PowerEdge XE9640 comes equipped with various reliability and redundancy features. Hot-pluggable power supplies, cooling, and drives ensure that the server can continue operating even if a component fails. This means minimal downtime for your critical workloads.
Management: Simplified Operations
Dell’s integrated management tools, including the iDRAC (Integrated Dell Remote Access Controller), make server management a breeze. With remote management and monitoring capabilities, you can keep a close eye on the server’s health and performance, all from a single, intuitive interface.
Security: Protecting Your Data
In the modern age, data security is paramount. The PowerEdge XE9640 offers a range of security features to safeguard your data, including hardware root of trust, secure boot, and intrusion detection. It’s a fortress for your data in an increasingly complex digital world.
Conclusion: Empowering Your Data Center
The Dell PowerEdge XE9640 is a formidable server solution designed to empower your data center. Its combination of robust hardware, scalability, reliability, and security features makes it an excellent choice for businesses of all sizes. Whether you’re a growing startup or a large enterprise, this server can meet your needs today and adapt to your demands in the future.
In the world of data centers and enterprise IT, the Dell PowerEdge XE9640 stands as a testament to Dell’s commitment to providing powerful and adaptable solutions. It’s more than just a server; it’s a partner in your journey towards a more efficient and effective data center.
by Sangeetha | Sep 27, 2023 | Tape Drive, Tape Library
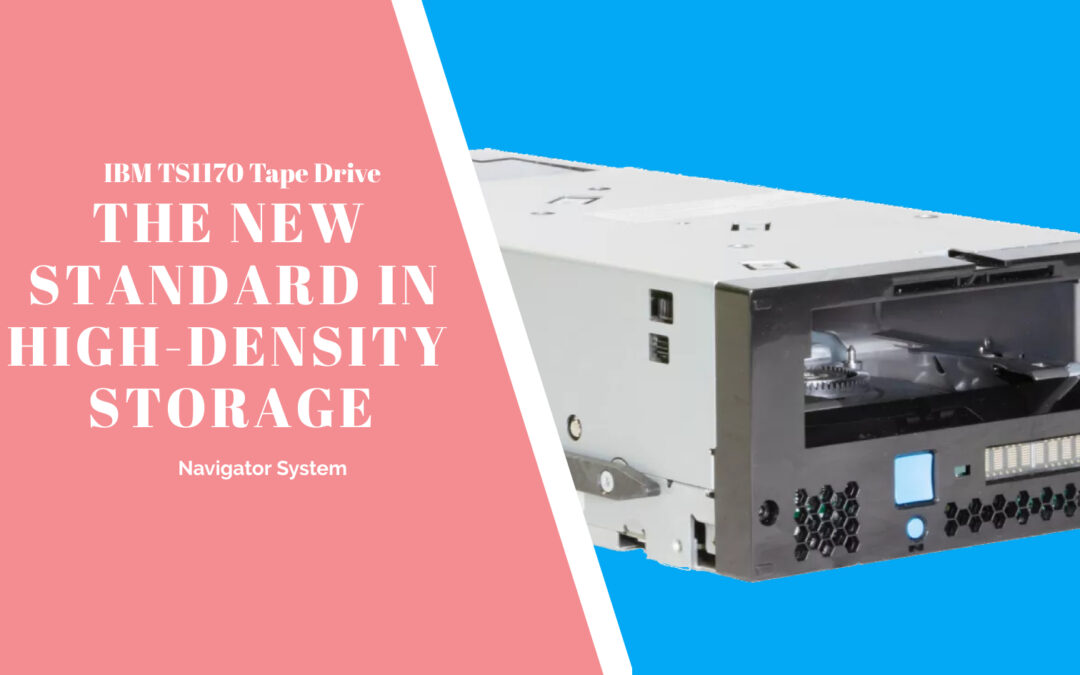
IBM TS1170 Tape Drive 50TB High-Density Announced: A Giant Leap in Data Storage
In the ever-evolving landscape of data storage, where businesses and organizations are constantly seeking more efficient and cost-effective ways to manage their data, IBM has made a significant stride with the introduction of the IBM TS1170 50TB High-Density Tape Drive. This groundbreaking technology promises to revolutionize data storage solutions, offering an impressive 50 terabytes of storage capacity in a single tape cartridge. In this article, we’ll explore the key features, benefits, and implications of IBM’s latest innovation.
The Need for High-Density Data Storage
As the digital universe continues to expand exponentially, the demand for reliable, high-capacity data storage solutions is at an all-time high. Businesses across various industries are generating vast amounts of data every day, including critical information, analytics, and archival data. Storing and managing this data efficiently and securely has become a top priority.
While cloud storage and solid-state drives (SSDs) have their advantages, tape storage remains a cost-effective, reliable, and scalable option for long-term data retention. IBM has been a pioneer in tape storage technology for decades, and the IBM TS1170 is the latest testament to their commitment to innovation in this field.
Key Features of the IBM TS1170 Tape Drive
50 Terabytes of Native Storage: The most notable feature of the TS1170 is its massive 50TB native storage capacity per tape cartridge. This significant increase in storage density allows businesses to store more data in a smaller physical footprint, reducing the overall cost of data storage.
Ultra-Fast Data Transfer: The TS1170 offers impressive data transfer rates of up to 20TB per hour, making it ideal for organizations with high data backup and restore requirements. This speed ensures minimal downtime and efficient data retrieval.
Enhanced Security: Security is a top concern in today’s data-driven world. The TS1170 includes advanced encryption capabilities to protect data during storage and transit, ensuring that sensitive information remains secure.
Compatibility and Scalability: IBM designed the TS1170 with backward compatibility in mind, allowing organizations to seamlessly integrate it into their existing tape storage infrastructure. This scalability makes it a practical choice for businesses of all sizes.
Long-Term Reliability: Tape storage is known for its durability and reliability, with a significantly longer lifespan than many other storage solutions. The TS1170 continues this tradition, providing a trustworthy option for long-term data retention.
Benefits and Implications
The introduction of the IBM TS1170 tape drive carries several key benefits and implications for businesses and organizations:
Cost Savings: By providing an extremely high storage capacity in a single tape cartridge, the TS1170 helps organizations reduce their overall storage costs. Businesses can store more data in less space, which translates to lower operational expenses.
Efficiency: The high data transfer rates of the TS1170 enable quick backup and recovery processes, reducing downtime and enhancing operational efficiency.
Data Security: Enhanced encryption features ensure that sensitive data remains protected, meeting compliance requirements and safeguarding against data breaches.
Scalability: The backward compatibility of the TS1170 allows organizations to seamlessly integrate it into their existing infrastructure and scale their storage solutions as needed.
Sustainability: Tape storage is inherently energy-efficient, as tapes do not require continuous power to maintain data. This eco-friendly aspect aligns with the growing emphasis on sustainability in modern business practices.
Conclusion
The IBM TS1170 50TB High-Density Tape Drive marks a significant advancement in data storage technology. With its massive storage capacity, fast data transfer rates, and robust security features, it offers businesses a compelling solution for managing their ever-growing data needs. As organizations continue to grapple with the challenges of data storage and management, IBM’s commitment to innovation ensures that they have a reliable and efficient solution to meet their requirements. The TS1170 tape drive is a testament to the enduring relevance of tape storage in an era of digital transformation.
by Sangeetha | Sep 12, 2023 | Uncategorized
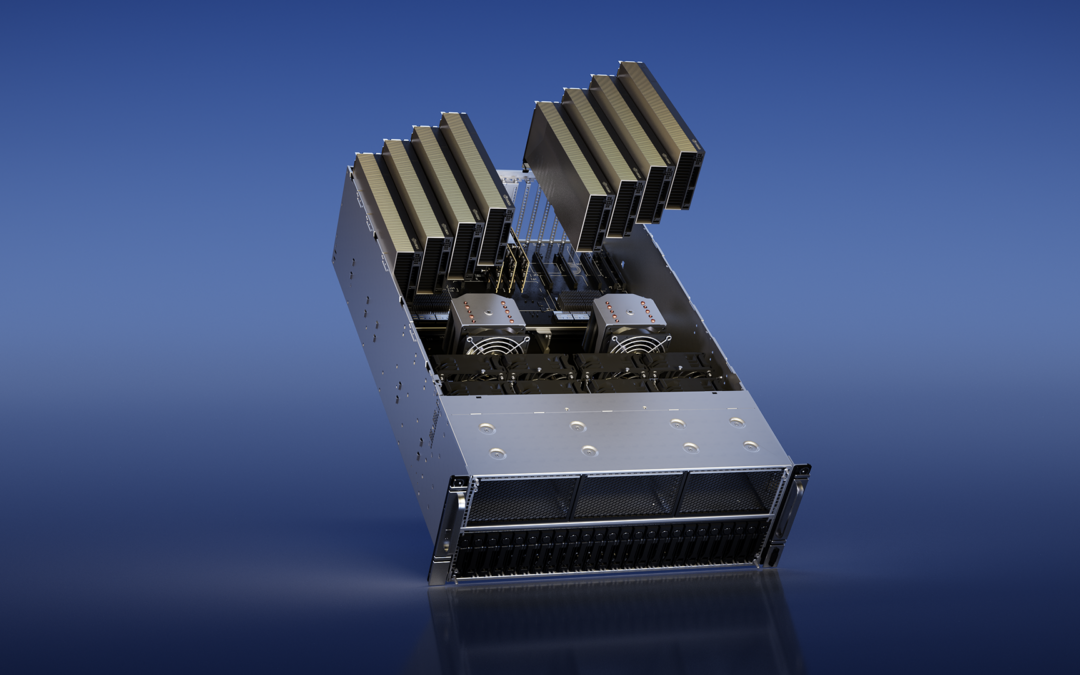
Cutting-edge ASUS ESC8000 and ASUS ESC4000 servers
In the ever-evolving landscape of technology, innovation is the key to staying ahead of the curve. ASUS, a renowned name in the world of computing and electronics, has once again proven its commitment to pushing the boundaries of what’s possible. The latest announcement from ASUS has sent ripples of excitement through the tech community, as the company unveils its cutting-edge ASUS ESC8000 and ASUS ESC4000 servers, equipped with the advanced NVIDIA L40S GPUs.
The fusion of ASUS’s expertise in server technology with NVIDIA’s cutting-edge graphics processing power is a remarkable milestone in the world of data centers and server solutions. Let’s dive into what makes these servers so impressive and why they’re generating such buzz.
Powerful Processing with NVIDIA L40S GPUs
At the heart of these new servers lies the NVIDIA L40S GPU, a powerhouse designed to deliver exceptional performance for data-intensive tasks. NVIDIA’s GPUs have long been recognized for their prowess in graphics processing, machine learning, and artificial intelligence, making them a natural fit for the demands of modern server applications.
The advanced NVIDIA L40S GPUs incorporated into ASUS’s ESC8000 and ESC4000 servers offer enhanced computational capabilities and improved energy efficiency. This means that businesses can now harness the power of accelerated computing to tackle complex workloads with greater ease and speed. Whether it’s scientific simulations, AI training, rendering, or any other GPU-intensive task, these servers promise to significantly boost productivity and reduce processing times.
Impressive Scalability and Reliability
One of the standout features of ASUS’s ESC8000 and ESC4000 servers is their scalability. These servers are designed to accommodate the evolving needs of businesses and data centers, allowing for easy expansion as demands grow. This scalability is particularly crucial in today’s dynamic IT landscape, where adaptability is a key factor in staying competitive.
Moreover, ASUS has always been synonymous with reliability, and these servers are no exception. They come equipped with robust components and a meticulously engineered cooling system to ensure optimal performance and long-term durability. ASUS’s commitment to quality and reliability is backed by years of experience in delivering top-notch computing solutions.
Efficiency and Sustainability
In addition to their impressive performance and reliability, ASUS’s ESC8000 and ESC4000 servers are also designed with energy efficiency in mind. Data centers consume vast amounts of electricity, making sustainability a pressing concern. These servers incorporate power-saving features and intelligent management tools that help optimize energy consumption without compromising performance. This not only reduces operating costs but also contributes to a more eco-friendly data center infrastructure.
The Future of Data Centers
ASUS’s unveiling of the ASUS ESC8000 and ASUS ESC4000 servers featuring advanced NVIDIA L40S GPUs marks a significant step forward in the realm of data centers and server technology. These servers promise to empower businesses and data centers with the computational muscle needed to tackle the challenges of today’s data-driven world.
As industries continue to evolve and adopt more data-intensive applications, the demand for high-performance computing solutions is greater than ever. ASUS’s commitment to innovation ensures that these servers will be at the forefront of meeting these demands, providing businesses with the tools they need to thrive in a rapidly changing digital landscape.
In conclusion, ASUS’s announcement of the ESC8000 and ESC4000 servers is a testament to their dedication to excellence and innovation. By combining the power of NVIDIA’s L40S GPUs with their own server expertise, ASUS has created a solution that promises to redefine the capabilities of data centers and server technology. As businesses continue to harness the potential of advanced computing, these servers are set to play a pivotal role in shaping the future of data centers and the industries they support.
by Sangeetha | Aug 30, 2023 | Uncategorized
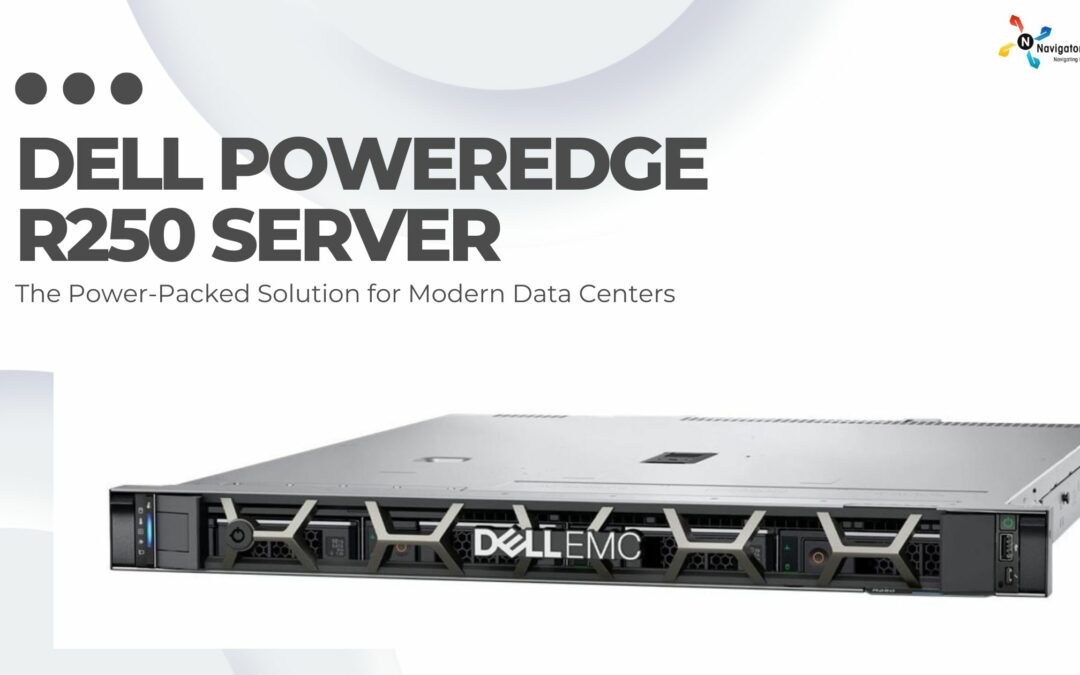
In the ever-evolving landscape of technology, data centers play a crucial role in driving businesses forward. At the core of a high-performing data center lies the hardware that powers it. The Dell PowerEdge R250 Rack Server stands as a beacon of innovation, delivering exceptional performance, scalability, and efficiency to meet the demands of the modern data center. In this article, we will dive into the technical specifications and advantages of the Dell PowerEdge R250, showcasing how it redefines data center capabilities.
The Dell PowerEdge R250 is a meticulously engineered server that brings together cutting-edge components to create a powerhouse capable of tackling a wide range of workloads. Here are some of its standout technical specifications:
- Processor Power: The server is powered by Intel Xeon processors, harnessing the full capabilities of modern computing technology. These processors provide the foundation for high-speed data processing and optimal performance.
- Memory Mastery: With support for up to 64 GB DDR4 of RAM, the Dell PowerEdge R250 ensures that memory-intensive applications run smoothly. This high memory capacity translates into enhanced multitasking capabilities and seamless virtualization.
- Storage Versatility: The server offers multiple storage options, including support for hot-swappable drive bays and high-speed NVMe drives. This versatility allows businesses to configure storage to match their specific needs, whether it’s rapid data access or robust storage capacity.
- Network Connectivity: Equipped with advanced networking capabilities, the Dell PowerEdge R250 ensures fast and reliable data transmission. It supports Gigabit Ethernet and offers options for 10GbE networking, enabling seamless communication within the data center environment.
- Management and Security: The Integrated Dell Remote Access Controller (iDRAC) empowers administrators with remote management capabilities, ensuring optimal server performance and ease of maintenance. Security features like Trusted Platform Module (TPM) enhance data protection, making the server suitable for a wide range of applications.
Advantages of the Dell PowerEdge R250
- Performance Powerhouse: This PowerEdge Server excels in delivering unparalleled performance. Its robust processing power, coupled with ample memory and high-speed storage options, ensures that resource-intensive applications run smoothly and efficiently. This performance boost directly translates into increased productivity and faster data processing.
- Scalability and Adaptability: Modern data centers demand adaptability to accommodate evolving workloads. The PowerEdge R250’s modular design allows businesses to scale up as their needs grow. Whether it’s expanding storage or upgrading processing power, the server seamlessly accommodates changes without disrupting operations.
- Reliability and Availability: With redundant power supplies and hot-swappable components, the Dell PowerEdge R250 ensures high availability and minimal downtime. This reliability is crucial for businesses that require 24/7 operation and depend on uninterrupted service delivery.
- Energy Efficiency: The Dell server’s energy-efficient design optimizes power consumption while maintaining top-tier performance. This not only reduces operational costs but also aligns with eco-friendly initiatives, making it a responsible choice for environmentally-conscious data centers.
- Simplified Management: The integrated management tools, including iDRAC and OpenManage software, streamline administrative tasks and reduce the burden on IT teams. Remote monitoring, automated maintenance, and enhanced security features contribute to a more efficient management experience.
Conclusion
The Dell PowerEdge R250 Rack Server is the embodiment of performance, scalability, and efficiency, making it the ideal choice for modern data centers. With its robust technical specifications and numerous advantages, it empowers businesses to tackle complex workloads, adapt to changing demands, and maintain a competitive edge in the digital era.
Investing in the Dell PowerEdge R250 is not just about acquiring a server; it’s about embracing a solution that elevates data center capabilities, enhances efficiency, and drives business growth. As technology continues to evolve, the PowerEdge R250 stands as a testament to Dell’s commitment to delivering innovative solutions that power the future of data centers.


