by Sangeetha | Aug 8, 2023 | Uncategorized
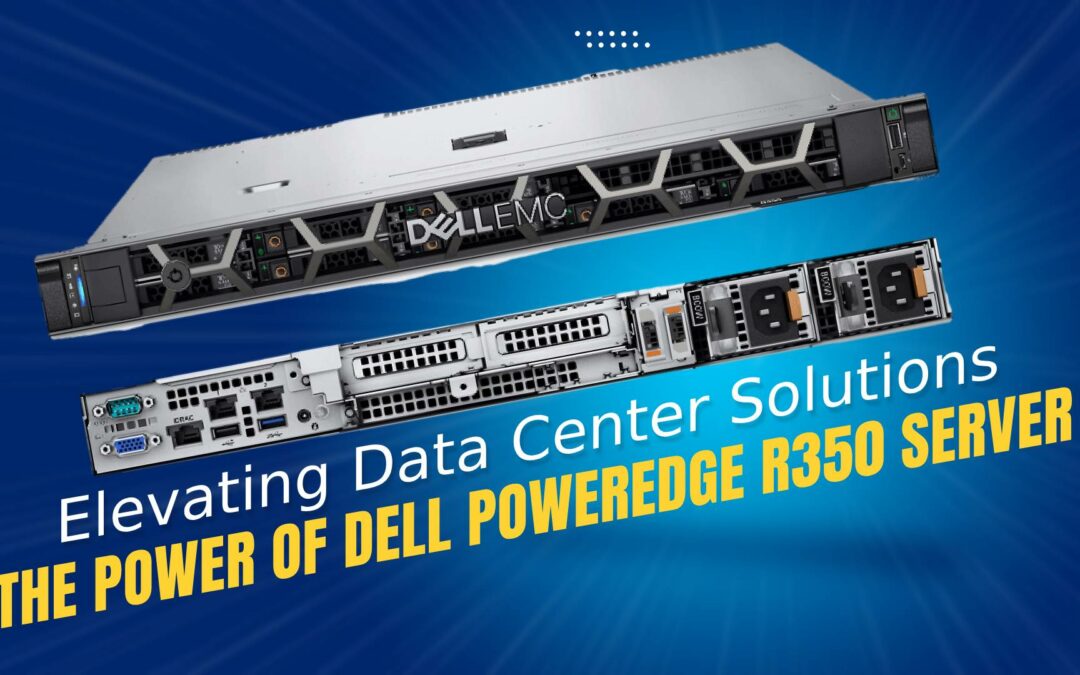
Exploring the Dell PowerEdge R350 Server
In the fast-paced digital landscape, data centers are the engines that drive modern businesses. The quest for high-performance solutions has led to the evolution of the Dell PowerEdge R350 Server, a remarkable addition to Dell’s lineup. In this article, we’ll delve into the technical specifications and explore the advantages that make the Dell PowerEdge R350 a powerhouse in the realm of data center servers.
Tech Specifications
The Dell PowerEdge R350 is a testament to innovation, integrating cutting-edge components to create a server that excels in performance and adaptability. Here’s a look at some of its notable technical specifications:
- Processing Power: One Intel® Xeon® E-2300 series processors with up to 8 cores/ One Intel® Pentium® processor with up to 2 cores, At the heart of the PowerEdge R350 lies the processing prowess of Intel Xeon processors. These processors are designed to deliver exceptional computing power, enabling rapid data processing and seamless multitasking.
- Memory Mastery: With support for up to UDIMM 128 GB of memory, the Dell PowerEdge R350 is ready to handle memory-intensive applications with ease. This large memory capacity facilitates smooth virtualization and efficient handling of complex workloads.
- Storage Flexibility: The server offers diverse storage options, including support for hot-swappable drive bays and high-performance NVMe drives. This flexibility allows businesses to tailor their storage configuration to their specific needs, be it speed or capacity.
- Networking Excellence: Equipped with advanced networking capabilities, the PowerEdge R350 ensures swift and reliable data transmission. It supports Gigabit Ethernet and offers options for 10GbE networking, enhancing connectivity within the data center environment.
- Management and Security: The Integrated Dell Remote Access Controller (iDRAC) empowers administrators with remote management capabilities, ensuring efficient server performance and simplified maintenance. Features like Trusted Platform Module (TPM) enhance data security, making the server suitable for various applications.
Advantages of the Dell PowerEdge R350
- Performance Paragon: The Dell PowerEdge R350 stands out as a performance powerhouse. Its robust processing capabilities, combined with ample memory and fast storage options, enable seamless execution of resource-intensive applications. This performance boost directly translates into improved productivity and faster data processing.
- Adaptability and Scalability: In the dynamic landscape of data centers, adaptability is key. The PowerEdge R350’s modular design empowers businesses to scale up as demands evolve. Whether expanding storage or upgrading processing power, the server seamlessly accommodates changes without disrupting operations.
- Reliability and Availability: Redundant power supplies and hot-swappable components ensure high availability and minimal downtime. This reliability is paramount for businesses requiring continuous operation and uninterrupted service delivery.
- Energy Efficiency: The server’s energy-efficient design optimizes power consumption while maintaining peak performance. This not only reduces operational costs but also aligns with environmental initiatives, making it a responsible choice for eco-conscious data centers.
- Streamlined Management: The integrated management tools, such as iDRAC and OpenManage software, simplify administrative tasks and ease the burden on IT teams. Remote monitoring, automated maintenance, and enhanced security features contribute to an efficient management experience.
Conclusion
The Dell PowerEdge R350 Server represents a fusion of power, adaptability, and efficiency, making it the epitome of modern data center solutions. With impressive technical specifications and a host of advantages, it empowers businesses to navigate complex workloads, respond to changing demands, and maintain a competitive edge in the digital age.
Investing in the Dell PowerEdge R350 is more than just acquiring a server; it’s embracing a solution that elevates data center capabilities, enhances efficiency, and propels business growth. As technology continues to advance, the PowerEdge R350 stands as a testament to Dell’s commitment to delivering innovative solutions that drive the future of data centers forward.
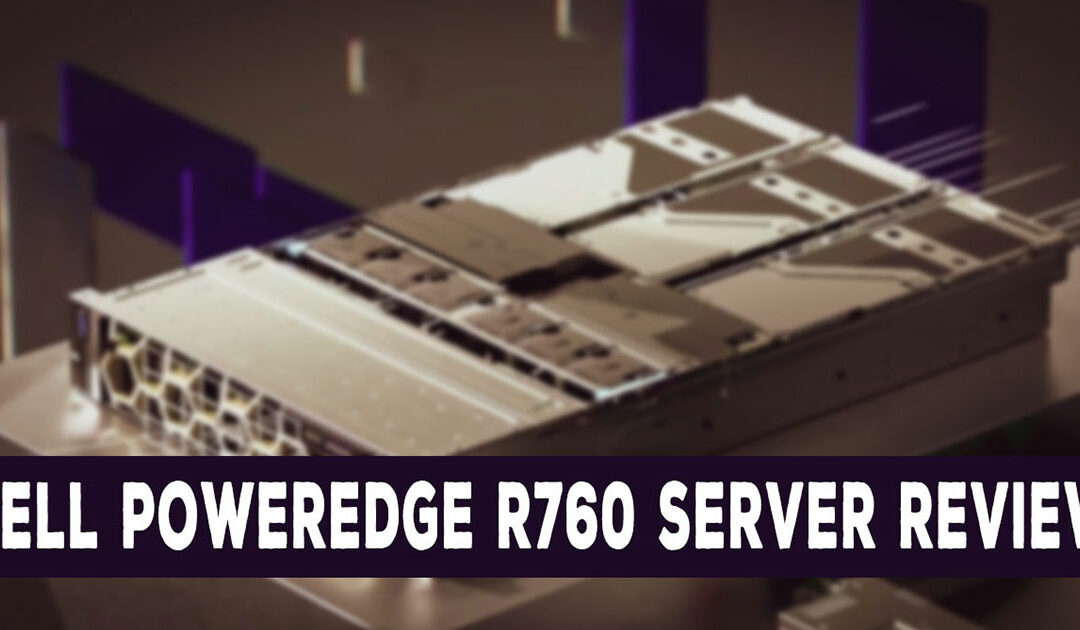
by Sangeetha | Jun 29, 2023 | Dell Server, Dell PowerEdge Server
The Dell PowerEdge R760 Server is a high-performance server designed to meet the demands of modern data centers and enterprise environments. Packed with robust features, scalability options, and exceptional performance, the PowerEdge R760 stands as a formidable solution for businesses seeking reliability, power, and versatility. In this comprehensive review, we will delve into the key aspects that make the Dell PowerEdge R760 a powerhouse in the server market.
Performance and Scalability:
At the core of the PowerEdge R760 lies the Intel Xeon Scalable processor family, which delivers unparalleled performance and scalability. The server supports up to two processors, each with up to 28 cores, allowing for a maximum of 56 cores and 112 threads. This processing power enables the server to handle intensive workloads, including virtualization, database management, and data analytics, with remarkable ease.
The PowerEdge R760 offers impressive memory capacity, supporting up to 3TB of DDR4 RAM across 48 DIMM slots. This vast memory capacity ensures smooth multitasking and efficient handling of memory-intensive applications.
Storage Capabilities:
The PowerEdge R760 excels in storage capabilities, providing flexibility and scalability to accommodate diverse storage needs. It supports up to 24 hot-pluggable 2.5-inch SAS, SATA, or SSD drives, allowing for ample storage space for critical data. Additionally, it offers optional NVMe drives for ultra-fast storage performance, ideal for data-intensive applications requiring rapid access to large datasets.
Reliability and Redundancy:
Dell has incorporated a range of features in the PowerEdge R760 to ensure maximum uptime and reliability. Redundant power supplies and cooling fans, along with hot-swappable components, minimize the risk of system failures and facilitate easy maintenance. With Dell’s iDRAC9 management controller, administrators can remotely monitor and manage the server, enabling proactive maintenance and troubleshooting.
Expandability and Connectivity:
The PowerEdge R760 provides extensive connectivity options to accommodate diverse networking requirements. It offers multiple PCIe slots, including Gen4 support, enabling the installation of various expansion cards such as GPUs, NICs, and storage controllers. This flexibility allows businesses to customize the server based on their specific needs, ensuring future scalability and adaptability.
Management and Security:
Dell’s OpenManage Enterprise management console simplifies server administration, providing a centralized interface for monitoring, configuring, and updating multiple PowerEdge servers. Additionally, the PowerEdge R760 includes comprehensive security features such as Secure Boot, System Lockdown, and TPM 2.0, safeguarding data integrity and protecting against unauthorized access.
Energy Efficiency:
In today’s environmentally conscious world, energy efficiency is a crucial consideration. The PowerEdge R760 incorporates Dell’s Fresh Air 2.0 technology, enabling it to operate in higher ambient temperatures while maintaining optimal performance. This capability reduces cooling costs and energy consumption, contributing to a greener and more cost-effective data center.
Conclusion:
The Dell PowerEdge R760 stands as an impressive server solution that excels in performance, scalability, reliability, and connectivity. With its powerful processors, vast memory capacity, extensive storage options, and advanced management features, the PowerEdge R760 caters to the needs of enterprise environments and data centers. Whether it’s handling virtualization, data analytics, or critical workloads, the PowerEdge R760 delivers exceptional performance and versatility, making it a worthy investment for businesses seeking a robust and future-proof server solution.

by Sangeetha | Jun 17, 2022 | Server AMC, Server Maintenance, Uncategorized
HPE VS Dell Servers: Important Main Factors To Decide
Navigator System provides Warranties, Care Pack, and Support Services by Original OEM as well as all HPE Renew and Dell Recertified products are covered by our own NSPL warranty, service, and support options.
DELL Support Vs NSPL Support
Dell ProSupport is a paid reliable support program to download any updates or firmware. Few Dell Firmware is also free to download. Also provides a site to find updates for your systems.
If you can afford it, pro support is a worthwhile investment, if you can afford it. Dell will soon be requiring a support contact for downloads in the future. Dell Spares can be more particular about documentation for part replacements.
Dell Support Options from Navigator System
Navigator System offers 3, 4, 5, and 7-year Support. Options include ProSupport NBD, ProSupport Mission Critical, ProSupport Plus NBD, ProSupport Plus Mission Critical, and KYHD (Keep Your Hard Drive).
HPE Support Vs NAVIGATOR SYSTEM
HPE service/support contract must download any new firmware or updates. HPE’s support for replacing parts and their supply chain has also good as DELL.
Users can create an online account through HPE’s website allows for extensive personalization with specific portfolios that every HPE hardware your business owns.
Also, gain access to HPE 24/7 support, manage future orders, and the ability to utilize the HPE Operational Support Services experience to help manage the day-to-day IT operational tasks.
Depending on your business’ level of growth and experience, it may be worth it to explore everything HPE support has to offer. With that said, the navigation and general user experience is still overwhelming.
HPE Support Options from Navigator System
As you know, HPE Renew products carry the same-as-new warranty from Hewlett Packard Enterprise. In addition, Navigator System offers 1,3 and 5-year support and also 1-year post warranties.
Reliability Dell/HP/NSPL
Dell pro support
Dell EMC PowerEdge is continuously improving its servers, to avoid breakdown and the more recent lines generally reinforce that fact.
HPE Support
HPE Proliant systems really do a good job with predictive alerts for parts that are liable to fail. This allows the enterprise to repair or replace parts before they break down.
HPE Superdome line showed incredible reliability. So, for mission critical big data workloads, HPE’s solution does seem reliable.
HPE’s Apollo line are for users to determine long term reliability.
Dell server Maintenance
Dell was more affordable but less flexibility on price when negotiating with Dell. So consistent customers willing to cut more of a deal.
Used Dell Servers and spares are relatively easy to find. It benefits from being self-referential.
HPE Server Maintenance
HPE more flexible on price. HPE Server has a more comprehensive documentation system. Find manuals for every part HPE made.
Management Tools
All Out of Band Management systems with HTML5 support, HPE’s Management tool iLO, and Dell EMC’s iDRAC.
Dell IDRAC
Dell iDRAC with java after iDRAC 7 and new iLO GUI.
As far as licensing goes, iDRAC uses a physical license, which can be bought on the secondary market and prevent being locked in again with the OEM after end of life.
Updates are generally a bit longer with iDrac, and in general it seems a bit more sluggish than iLO. As far as a previous point of contention, iDRAC does have a similar tool to RIS, called OpenManage Essentials, though both have their issues on some browser versions.
HPE ILO
ILO standard is included, but Advanced (i.e. post console session) requires a license, which can lock you in with the OEM if your servers go EOL; you can’t buy them from the used market.
Some users will claim that you only have to buy one key because you can reuse the advanced key on multiple servers, but this is against the terms of service; you do have to purchase new keys just as with iDRAC.
Overall, the GUI with ILO seems more intuitive and the platform seems a bit more snappy, but there are more important things to consider than the out-of-band management interface.
Final Roundup
At the end of the day, HPE and Dell are both fairly similar companies with similar offerings, and so when comparing HPE vs dell servers, there is no clear-cut winner. There isn’t a huge difference between the companies as far as build quality, price, or reliability, so those are going to be best evaluated on a case-by-case basis.
However, Navigator System NSPL support make difference as a service provider of choice when we evaluate HPE vs dell servers. That being said, in almost all cases they provide comparable hardware and services, so companies should always do their due diligence and evaluate their options on a case-by-case basis.

by Sangeetha | Jun 5, 2022 | Uncategorized
When it involves maintaining IT assets, there are 2 ancient paths: work with the OEM or handle everything in-house. Whereas those may be the foremost common choices, they’re not invariably the correct solutions. Adding third party maintenance into your support strategy may well be the key to unlocking time and money savings while guaranteeing that your IT team is ready to specialize in what they are doing best. Does one get to work with a 3rd party maintenance provider? Below, we’ll discuss 5 signs that it’s time to form the switch.
#1: IT ASSETS face the top OF THEIR PRODUCT guarantee
The first sign that you just want a 3rd party maintenance supplier is pretty obvious. You’re running out of guarantee on your operational device and there’s no area within the budget to refresh to the manufacturer’s latest model. Once your device reaches its finish of service life (EOSL), the initial instrumentality manufacturer (OEM) won’t give you service unless you’ve already purchased an expensive extended guarantee. Even then, it’s solely a matter of your time till that agreement runs out, so you have got no different recourse however to upgrade (or worse, go while not coverage).
However, if the budget isn’t there, otherwise you don’t see the purpose in willy-nilly agitated out hardware that works simply fine as a result of the OEM desires you to, there’s another choice. a 3rd party maintenance supplier will step in wherever the OEM fails and supply you with the guarantee coverage you wish for peace of mind.
At Navigator Systems, we tend to often facilitate our shoppers to extend the lifetime of their IT assets by 5 to ten years on the far side the official finish of Service Life (EOSL).
#2: YOU’RE FACING RISING SUPPORT PRICES FROM THE OEM
It happens to each IT manager. Everything’s fine so at some point, you receive notice from the OEM that your device is formally finished with life. Besides the fact that you’re currently living on borrowed time, the OEM is good enough to allow you to grasp that as a result of the device’s EOL, you’ll get to spit up even extra cash for support.
Often, the price is preventive – those extended warranties are often implausibly overpriced. That leads you to the question of whether or not you wish for a guarantee within the initial place. After all, things have in all probability been fine up to now. What’s the chance of simply not re-upping and running while not a support agreement? sure as shooting your IT team has the talent necessary to troubleshoot any problems that you just may face, right? Wrong.
Going while not supporting in any respect is often staggeringly risky. Not solely is there the tidy issue of attempting to supply replacement parts on your own, however, there’s no guarantee that your IT team will install them and put together the system. With a 3rd party maintenance supplier like Navigator Systems, you get the protection you wish and therefore the money savings you be. We tend to often save our shoppers between four-hundredth associate degreed ninetieth on what the OEM would have charged for an extended guarantee.
#3: YOU’RE FACING DATA MEASURE TROUBLES
Another positive sign that it’s time to contemplate operating with a 3rd party maintenance supplier is that you’re facing information measure problems along with your IT team. If you have got a tiny low team or solely a couple of members of the team have the talents needed, it will place a massive strain on the whole department.
Things will snowball and therefore the demand for support solutions will grow on the far side of what you or your regular employees will give. Then you’re long-faced with the choice of whether or not to source your desires, rent a lot of employees, or take another step. operating with a 3rd party maintenance supplier ensures that you just have the assistance you want once you need it, while not the extra prices and complexities involved in hiring a lot of IT employees or outsourcing your desires.
#4: NEED FOR SPECIALISTS TALENT
Often, tiny to medium-sized firms need skilled services that can’t be accomplished among internal IT talent. And that they are sure as shooting don’t have the resources obtainable to rent extremely specialised IT staff! At Navigator Systems, our 2,500 trade specialists are prepared and obtainable to produce essential services once you’re facing a damaging Downtime. These field engineers vary from general technicians that have expertise with the merchandise set that they’ll be touching (storage, servers, or networking) to engineers with an awfully specific talent set that have primarily been trained on a selected manufacturer or maybe specific product line! which means you get access to top-of-the-line talent, together with Tier IV technicians, while not paying an arm and a leg.
A third party maintenance supplier will facilitate an exceedingly big selection of things, including, however not restricted to the following:
• Bringing a System makes an onerous copy Down
• Installation
• Implementation
• Configuration (any kind, doesn’t have to be compelled to be from scratch)
• Physically Moving/Relocating Systems
• Mounting
• Rack & Stack
• Upgrading microcode to the newest OS (Note: on condition that the software system is already in your possession)
So whether or not you need our skilled services on an hourly basis, or need yearly access to our engineers with the reinforcement of a support contract, our guys are here to help you!
#5: YOU’RE FACING MIGRATION DIFFICULTIES
Planning a move to the cloud? It’s an exciting time, however, there are loads to contemplate. One factor that surprises shoppers is the want for short-run coverage to bridge the gap between on-prem and cloud agreements.
The problem here is that OEMs don’t have the flexibility to handle these unpredictable time scales. for example, you would possibly be long-faced with the fact of shopping for a complete year of protection from the OEM once you solely want one or two months.
At Navigator Systems, we tend to perceive that migration doesn’t invariably escort a clear-cut timeline.
CHOOSE NAVIGATOR SYSTEMS AS YOUR THIRD PARTY MAINTENANCE supplier
From value savings to specialised solutions, facilitate through your migration, augmenting your in-house employees, and protective operational devices long when the official EOSL date, Navigator systems will facilitate. Contact us now to be told a lot concerning our versatile service level agreements (SLAs), our industry-leading engineers, and the way we can facilitate your organization’s success.
by Sangeetha | May 31, 2022 | Uncategorized
How to maximize performance by ensuring memory modules are properly ordered and populated in Intel 3rd Gen Xeon Scalable Processors servers
Memory Architecture of 2nd Gen Intel Xeon Scalable Processor
with two memory controllers that managed three memory channels per controller. Each channel could accept 2 DIMMs in the channel. To calculate the total DIMMs that a processor could support, multiply the number of controllers by the number of channels by the number of DIMMs per channel. For the 2nd Generation Xeon, this equaled a total of 12 DIMMs that a single processor could address.
2nd Gen Intel Xeon Scalable Processors 2 controller 6 channel memory architecture

This memory controller ran at DDR4-2933 speeds with 1 DIMM per channel populated. The speed reduced to DDR4-2666 when populated with 2 DIMMs per channel or Optane Persistent Memory Modules. The optimal configuration for maximizing memory bandwidth populated the same number of identical modules per channel. A two-socket server featured up to 24 DIMMs, allowing for two maximum performance configurations:

It should be noted that servers featuring 16 DIMMs exist for use cases requiring a total of 1TB of memory, but effective memory bandwidth was reduced by 34 percent due to an unbalanced configuration.
Memory Architecture of 3rd Gen Intel Xeon Scalable Processors
Each processor now has four memory controllers with two channels per controller. Each channel can be populated with two DIMMs. A 3rd Gen Xeon can address a total of 16 DIMMs per processor at full performance.
3rd Gen Intel Xeon Scalable Processors 4 controller 8 channel memory architecture

Each of the eight channels runs at DDR4-3200. This is regardless of the number of DIMMs per channel or if 200-series Optane Persistent Memory is populated. Improvements have also been made to the memory scheduler, lowering effective memory latency while increasing the overall bandwidth.
This new design results in a 2.6x increase in overall memory capacity and 1.5x increase in memory compared to 2nd Generation Xeon Scalable, without increasing read latencies at the local or remote socket layer. A two-socket server features up to 32 DIMMs and we still have two balanced memory configurations to choose from for maximum performance:

3rd Generation Xeon Scalable allows for larger capacity memory configurations without sacrificing memory bandwidth. So do some basic considerations should be followed when planning server memory:
- Memory modules must have identical specifications. Each DIMM must have an identical size, speed and rank.
- Channels are identically populated with either one or two DIMMs.
- Each CPU socket in the server must have an identical memory layout.
Scalable processors are available now in DellEMC PowerEdge 15G Servers, HPE ProLiant Gen10 Plus servers and Cisco UCS M6-series servers. We can accommodate virtually any use case or workload.